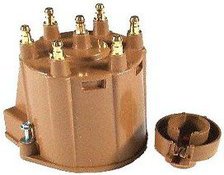
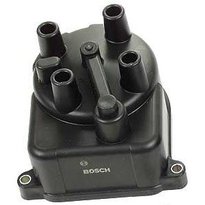
Distributor Cap and Rotor Ignition

This post is for people that still have a distributor cap and rotor ignition like me instead of the more modern ignition systems such as direct ignition or coil on plug type systems. Some vehicles including my 2004 Chevrolet Blazer still use a distributor cap and rotor to fire off their spark plugs.
This type of ignition system can cause car problems like an engine misfire or shudder under load. Caps and rotors have been around for a long time and for the most part they are extremely reliable. There is no shame in having a distributor ignition.
Sure your friends may say your vehicle is old-fashioned as they point and laugh at you while you’re in the parts store buying replacement parts. When this happens remind your friends that your cap and rotor only cost $28 while their individual coil that has failed might cost $200. A direct ignition coil and module assembly could cost around 350 bucks.
Problems with Cap and Rotors
The reason I’m writing this article is that I continue to see a common problem that develops on vehicles that use a distributor cap and rotor ignition systems. This would be moisture and corrosion that can build up inside. Back in the early 1990s the 4.3 Liter engine was extremely susceptible to this type of corrosion.

Technical service bulletins were created by General Motors to make technicians aware that the vent on the base plate could become clogged and accelerate the moisture buildup and corrosion inside the distributor. Not only would this damage the cap and rotor but it could also affect the ignition module.
The module connections can turn green and even disintegrated if the problem is not addressed. The technical service bulletin informed technicians that they needed to check that the vent screen and the base of the distributor was clean and allowing moisture to be vented out.
Just about every distributor that I checked in the early 1990s was experiencing this problem. When the cap was removed it looked like it snowed inside the distributor. Often it wasn’t until the vehicle was towed in for a no start condition that the problem was identified.
More Problems with Rotors and Distributor Caps
You should also make sure the distributor cap is properly seated on the base plate and all clips and screws are tightened securely to provide a good seal to keep moisture out. It is a good habit to inspect the distributor cap and rotor and check for physical damage and also corrosion build up inside.
Other types of damage that needs to be inspected would be electrical damage from high voltage. You can check for burned metal terminals and also carbon tracking inside the distributor cap. Carbon tracking is the formation of a line of carbonized dust between distributor Terminals or between a terminal and the distributor housing. Carbon tracking indicates that high voltage electricity has found a better path over or through the plastic.
The result can be car problems such as a misfire or shudder under load due to the spark plug firing at the wrong time. You can check the outer Towers and metal terminals for defects. Although distributors are usually well protected sometimes you find cracked plastic that may warrant replacement. You should also inspect the distributor rotor for a buildup of corrosion on the tip that passes voltage to the terminals of the cap.
Although you can take an emery board to the tip of the rotor to clean it I usually recommend replacing it because a distributor rotor is only about six dollars. For more information about solving car problems and the latest posts from this auto repair blog visit the homepage from that last text link. I recently wrote a page on my other website about no starts and no spark. If you have a no start condition and are interested in learning how to test for spark take a visit.

