3 Clean Auto Repairs within Most DIY Skill Sets
A lot of motorists think about diving into a few do-it-yourself auto repairs, but fail to follow through for a variety of reasons. Some of these reasons include fear of the unknown, the scary technology in modern automobiles and some don’t want to get dirty.
Here we’ll review three clean auto repairs within most DIY skill levels. Removing one of the three barriers listed above might be enough to push you into giving it a try. Also consider this, every mechanic, professional or otherwise had to start somewhere.
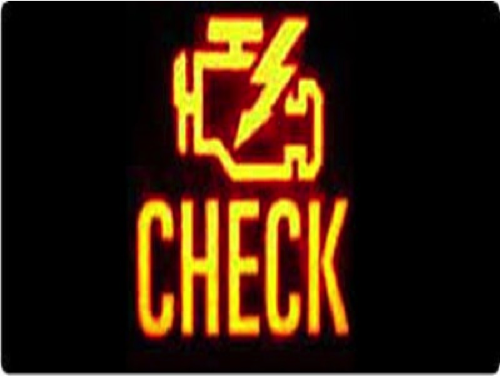
DIY Pulling Check Engine Light Diagnostic Codes
 Downloading the check engine light diagnostic trouble codes from an automobile newer than 1995 is easy and fun in my opinion. They equip these automobiles with OBD II systems. This stands for on-board diagnostics second-generation. What this means to mechanics is standardization applied to all vehicles.
This standardization also means the diagnostic connectors are the same shape and mounted in about the same place. You’ll find them below and to the left of the steering column. More importantly, the generic diagnostic trouble codes themselves are standardized across all years make and models with OBD II. Sidebar: Generic codes represent system failures found in all automobiles. In addition car-makers will have manufacturer specific codes for systems that are unique to their automobiles.
As an example, if you pull a code P0328 for a knock sensor circuit malfunction, it represents the same problem on a Chevrolet as it does on a Nissan or Kia. This standardization also had a major impact on the cost of the tool used to pull these diagnostic codes. If you just want to read and erase codes you can find tools to perform this function for less than $20.
This removes two barriers from the do it yourself auto mechanics list of reasons why they don’t want to do it. With the low cost and cleanliness of the operation there’s no harm in giving it a try. Another thing to consider is, sometimes these codes are set intermittently and no major problem exists on the automobile. By clearing the codes and seeing if it returns you have performed the first recommended step of diagnosis in almost any check engine light situation.
Replacing Engine Air and Cabin Filters
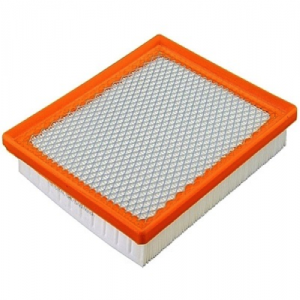
 Let me start this section off with a disclaimer. Some vehicles make it difficult to replace an air filter or cabin filter. Maybe this is to keep the dealership service department going. Nevertheless, I decided to include replacing the filters on this list of three clean DIY auto repairs. I did so because of the frequency of maintenance. Everyone should be comfortable with replacing them on their own cars and aware of their maintenance intervals.
I’ll use my own vehicle as an average level of difficulty example. They power my automobile with the 330 Horsepower 3.7 L Nissan V-6 engine. The two separate engine air filters are easy to service. They use spring clips to hold down the top of the air filter housing. When you snap the clip open the top tilts up and allows easy replacement of the filters. The procedure and the replacement part numbers are covered in the owner’s manual.
They fail to cover the cabin filter in the owner’s manual. Often it requires a little more do-it-yourself skills to accomplish replacement. If you own a repair manual, you can always use that for reference. On my model Nissan it’s necessary to remove the glove box to gain access to the heater case. As smart as I am, I didn’t see how the glove box came off at first. I went on YouTube and found about 20 videos showing detailed steps on how to remove the glove box. Basically, it’s just snaps in place and that’s why I didn’t see any retainers.
With the glove box out of the way you get a nice view of the heater case and blower motor. There’s a small cover marked with the word filter. This slides to the right and allows the replacement of the air filter element inside. Replacing a cabin air filter in most automobiles is a straightforward procedure and not much more difficult than replacing the air filter in your house. After replacing the engine air filter and cabin filters on my Nissan I didn’t even have to wash my hands.
Power Window and Door Lock Auto Repairs
I wanted to throw a curve ball out on this list of clean auto repairs within the skill set of many DIY mechanics. The reason I decided to include the power window and door lock repairs in this section is because these systems have straightforward operation and diagnostic procedures. They also share a short list of commonly failed components across many makes and models. The master switches take the most abuse and are often the source of many of the failures.
 Generally speaking the switches and the actuators on both the power door locks and power windows are what fail in 90 percent of the systems that malfunction. Before we get into diagnosis let’s talk about getting the door panel off your specific model to perform some initial diagnosis. This can be the hardest step in the entire process as each door panel has blind retainers and little tricks to get them off. On YouTube you’ll find detailed videos covering the removal of the door panel on almost every car on the planet.
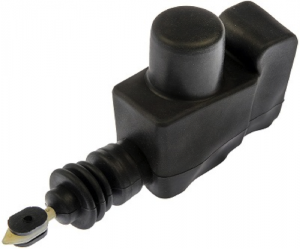
Most of the power door lock and power window systems work on 12 Volts. They use two power wires and 1 ground wire. You can take the connector off the actuator or motor and use an inexpensive 12 V test light to diagnose the problem. Using the door lock as an example, there should be a 12 V signal when the button is pushed to unlock and a 12 V lock signal on the other wire. If your test light illuminates when you push the lock and unlock buttons you have a failed actuator. If you are missing a lock or unlock signal you probably have a failed switch.
With the door panel removed switch replacements aren’t difficult. However the power door lock actuator takes more work on models using factory rivets. If you’re lucky you might have to take out a couple of bolts to replace it. The power window motor is another story. Some models make it difficult for a do-it-yourself newbie to replace the window lift motor. On the other hand, some models use a couple of 10 mm bolts to hold the motor in place.
Again, I ask you to check on YouTube for individual videos covering your model and its service procedures. After watching a few different clips you make an educated decision on whether this repair falls within your DIY skill set. If it’s not, you haven’t wasted your time, because now you know what’s wrong with it and you’ll be able to hunt down the best price on parts and labor.


