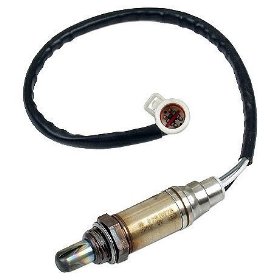
Testing Oxygen Sensors
Testing O2 Sensors

Testing oxygen sensors before replacing them is a good idea. This might not be the most common check engine light code but it is very high on the list of would be codes set in the computer’s memory. There are also many different types of oxygen sensor problems.
Often when a mechanic pulls one of these codes his first reaction may be to just go ahead and replace the sensor. There are more than 30 different codes that relate to the oxygen sensor circuit.
Some of these codes are dedicated to the heating circuit and some are dedicated to the power supply. But I believe by far the most common codes relate to the activity and efficiency of the sensor itself.
Not only can there be a wide variety of problems with the circuit that will throw a code for this exhaust stream sensor but vehicle problems can cause the code to set as well. One of the most common problems would be a vacuum leak that throws off the air fuel mixture providing a lean condition that can eventually set a code for lean exhaust.
Diagnosing Oxygen Sensor Parts
If you set a check engine light for an O2 sensor heater circuit problem it would be wise to make a few checks before you replace the part. If the O2 sensor heater is not working the sensor warm-up time is extended and the computer will stay in open loop longer. This can cause high engine emissions and poor fuel economy due to a rich mixture.
Testing oxygen sensors heater circuit can be performed by disconnecting the sensor connector and connect a voltmeter between the heater voltage supply wire (harness side) and ground. With the ignition switch on 12 V should be seen on your meter. If you have the proper voltage then you know the heater circuit is operating properly all the way down to the sensor.
You can then take your automotive meter and go from the heater terminals on the sensor side of the connector and take a resistance value. If your meter shows open (OL) and no resistance is present then this would be a strong indication that the heater has failed in the oxygen sensor itself.
Using a Scanner to Test O2 Sensors

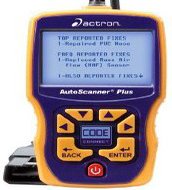
I know not everyone has an auto scanner, but this is one of the best ways to test oxygen sensors. The automotive scan tool has come down in price over the years and one that is capable of testing oxygen sensors can be had for under $150.
When you pull the oxygen sensor data stream up on your auto scanner the output voltage from the sensors should constantly cycle between high and low voltages as the engine is running in closed loop. This cycling of the voltage is actually the result of the computer constantly correcting the air fuel mixture in response to the feedback from the exhaust stream sensors.
When you are watching the output voltage it should move quickly between high and low voltages in mV. If the response is slow the sensor could be considered lazy and might need to be replaced. As a rule of thumb, with the engine RPMs at about 2000 the sensor should cycle from high to low between 20 and 40 times in a 20 second period. If the voltage is fixed and does not move or moves very sluggishly this could be a sign of a bad sensor.
Buying an auto scanner and testing oxygen sensors before replacement can save you money in the long run. On modern vehicles there are usually at least four sensors (2 upstream and 2 down stream). The average cost of this part being around $100 and in most cases the part is not returnable. Too often I see money wasted on replacing good sensors.
In closing I would like to mention that when I run across a vehicle that set a check engine light code of any kind, I prefer to follow a diagnostic chart in the car repair manual for that specific problem. For more of the latest posts visit the auto repair information blog home page.

